How to add an MCP server to ChatGPT
Add a remote MCP server to ChatGPT as a custom plugin, sign in with OAuth, and use its tools in a chat.
ChatGPT connects to tools beyond the chat through the Model Context Protocol (MCP). A remote MCP server you add yourself becomes a plugin: a custom MCP app that only you can see, which ChatGPT can call on in your conversations, including for actions that change things.
This guide uses the OutcomeCI MCP server as the running example. The same steps work for any remote MCP server; swap in its name and URL.
What you need
- ChatGPT on the web, on a plan that lets you create MCP apps. On Business and Enterprise plans, a workspace admin may have to allow custom apps first.
- The server's URL, and an account with the service behind it.
- For OutcomeCI, an OutcomeCI account with access to a workspace.
ChatGPT connects to the server from OpenAI's cloud, not from your computer.
The server has to be reachable on the public internet, so a server running on
localhost will not work here.
Add the server
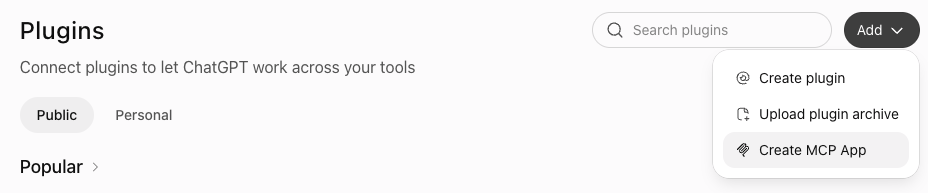
Open chatgpt.com, choose Customize in the left sidebar, then Plugins. Choose Add, then Create MCP App.
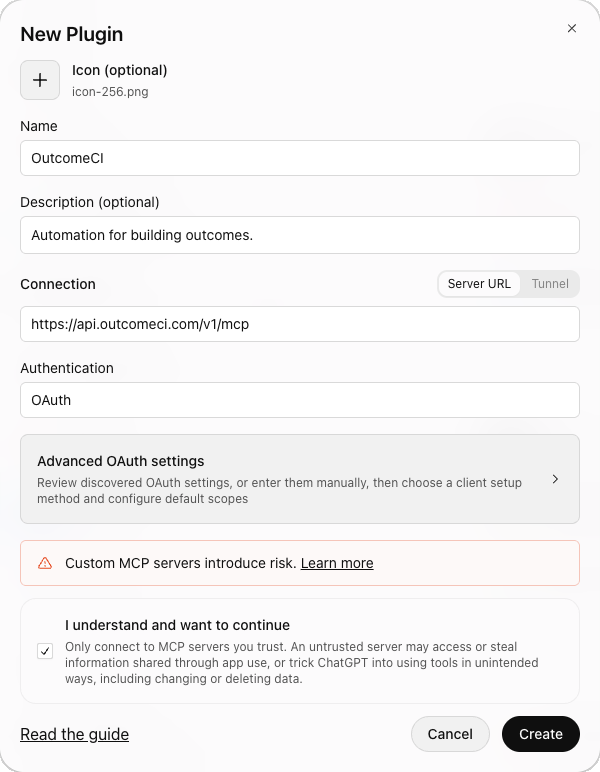
Fill in the New Plugin form:
| Field | Value |
|---|---|
| Name | OutcomeCI |
| Description | Build and manage OutcomeCI workflows |
| Connection | Server URL, then https://api.outcomeci.com/v1/mcp |
| Authentication | OAuth |
The description is optional, but it helps ChatGPT decide when the plugin is relevant, so say what it is for in plain words. The icon is optional too: a PNG of 10 KB or less.
Leave Advanced OAuth settings alone. ChatGPT discovers OutcomeCI's sign-in details from the server URL, and OutcomeCI registers ChatGPT as a client on its own.
Check I understand and want to continue, then choose Create.
If you do not see Plugins
Some ChatGPT versions add MCP servers through developer mode instead. Go to Settings, then Apps (or Apps & Connectors). Under Advanced settings, switch on Developer mode, then choose Create on the Apps page and fill in the same values. In a chat, apps added this way are offered from the Developer mode entry in the + menu.
Sign in
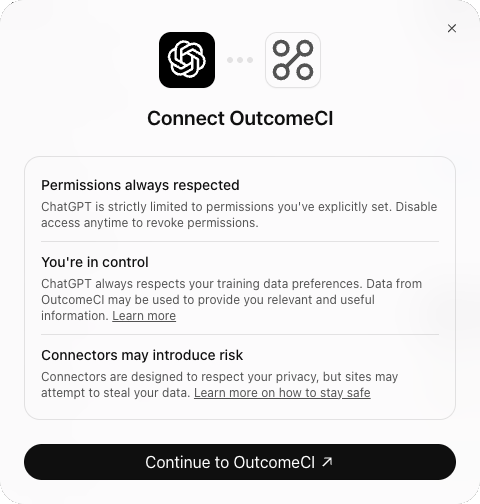
ChatGPT explains what connecting means and hands you to the provider. Choose Continue to OutcomeCI.
Then, on OutcomeCI:
- Sign in to OutcomeCI if prompted.
- Select the workspace you want ChatGPT to help configure.
- Review the requested access and select Allow access.
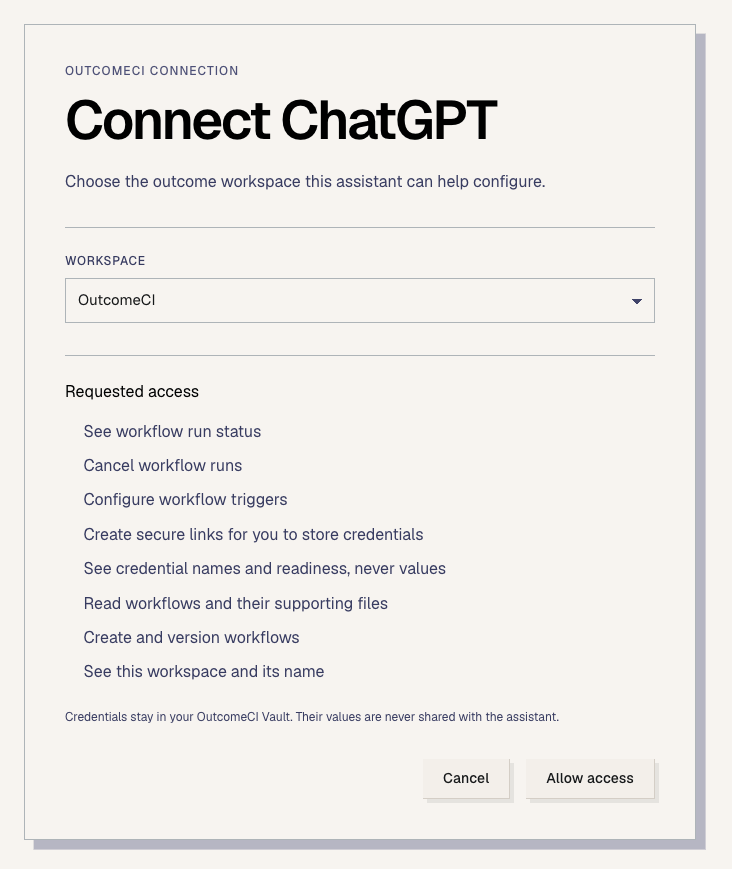
The access applies only to the workspace you choose. Credentials stay in your OutcomeCI Vault, and their values are never shared with ChatGPT.
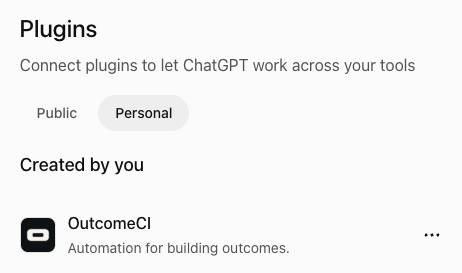
Back in ChatGPT, OutcomeCI appears under Installed in the sidebar, and on the Personal tab under Created by you.
Use it in a chat
Start a new chat and describe what you want:
Help me create an OutcomeCI workflow that runs every weekday at 9am, reads the open pull requests in our repository, and posts a summary of the ones waiting on review to Slack. Show me the workflow before publishing it.
If ChatGPT does not reach for the plugin on its own, open the + menu under the message box and pick OutcomeCI, or name it in your request.
ChatGPT shows the request before it calls a tool that changes something, and waits for you to confirm. Expand it to see exactly what will be sent.
When a workflow needs a credential, OutcomeCI gives you a browser form for it, so the value goes into your Vault and never passes through the conversation.
Troubleshooting
There is no Plugins page or Create MCP App. Your plan may not include custom MCP apps, or, on Business and Enterprise, an admin has not allowed them. Try the developer mode route.
Creating the plugin fails. Check the URL is complete and uses https. For
OutcomeCI it ends in /v1/mcp. Make sure Connection is set to
Server URL, not Tunnel.
You picked the wrong workspace. Remove OutcomeCI from the ... menu beside it on the Personal tab, then create it again and choose the right workspace when you sign in.
The plugin is not used in a chat. Pick it from the + menu, or name it in your request.
Next steps
- Connect your agent covers the OutcomeCI server for any MCP client.
- How to set up an MCP server in Codex does the same for OpenAI's Codex CLI.
- How to add an MCP server to Claude covers Anthropic's Claude apps.