How to add an MCP server to Claude
Connect a remote MCP server to Claude on the web, desktop, and mobile with a custom connector, sign in with OAuth, and turn it on in a chat.
Claude reaches tools beyond the chat through the Model Context Protocol (MCP). In the Claude apps, a remote MCP server is added as a custom connector. You add it once in settings, sign in, and switch it on in any conversation where you want Claude to use it.
This guide uses the OutcomeCI MCP server as the running example. The same steps work for any remote MCP server; swap in its name and URL. If you work in the terminal, see How to set up an MCP server in Claude Code instead.
What you need
- A Claude account on a plan that includes custom connectors. On Team and Enterprise plans, an owner adds the connector for the organization first.
- The server's URL, and an account with the service behind it.
- For OutcomeCI, an OutcomeCI account with access to a workspace.
Claude connects to the server from Anthropic's cloud, not from your computer.
The server has to be reachable on the public internet, so a server running on
localhost will not work here.
Add the connector
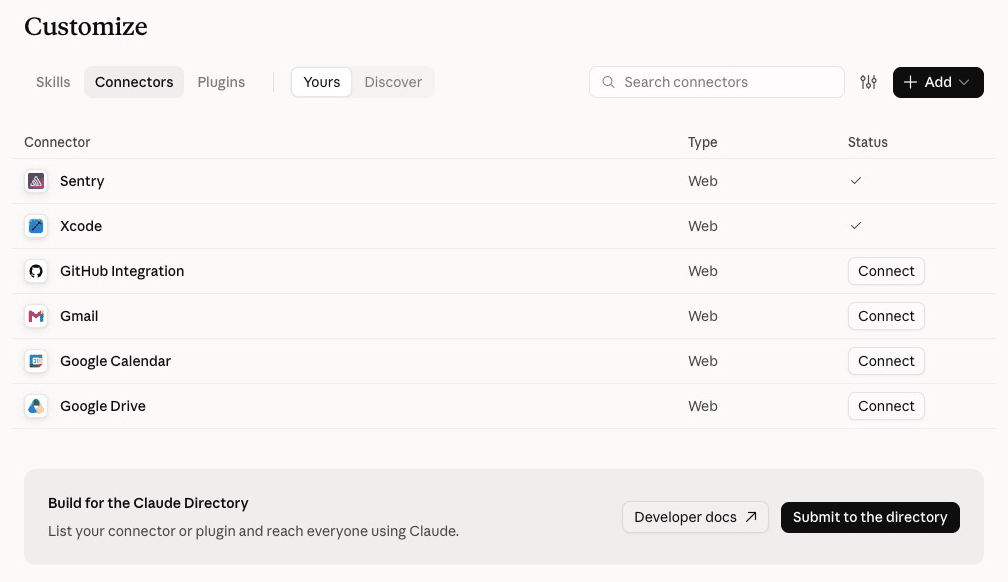
Open claude.ai and choose Customize in the sidebar, then the Connectors tab. Settings links to the same page, under Customize. Choose Add, then add a custom connector.
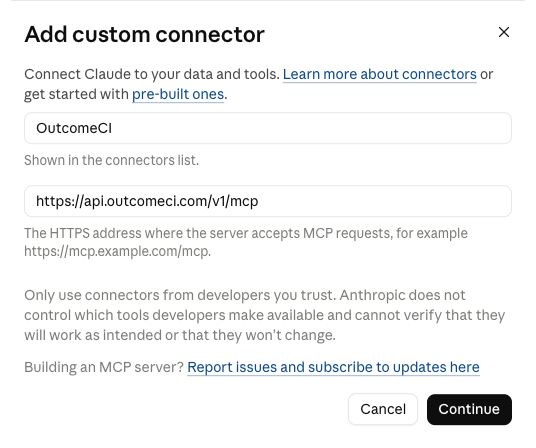
Fill in the first step of the dialog and choose Continue:
| Field | Value |
|---|---|
| Name | OutcomeCI |
| Server URL | https://api.outcomeci.com/v1/mcp |
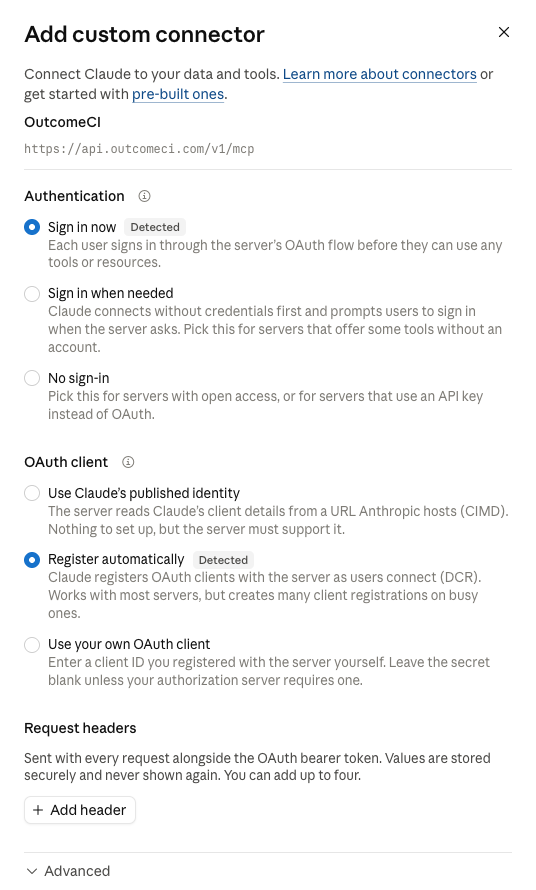
Claude then contacts the server and works out how to sign in to it. It marks the options it found as Detected. For OutcomeCI, keep the detected defaults:
| Setting | Choice | Why |
|---|---|---|
| Authentication | Sign in now | Every OutcomeCI tool needs a signed-in workspace |
| OAuth client | Register automatically | OutcomeCI registers Claude as a client when you connect, so there is nothing to create first |
Leave Request headers and Advanced alone, and finish adding the connector.
On a Team or Enterprise plan
An owner adds the connector once for the whole organization, using the same name and URL. Each member then connects it from their own Connectors tab with their own account. Nobody shares a login.
Sign in
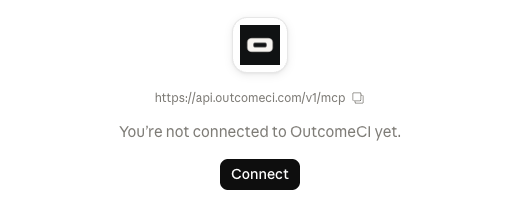
The new connector opens on its own page, not yet connected. Choose Connect.
Your browser opens the provider's sign-in page. For OutcomeCI:
- Sign in to OutcomeCI if prompted.
- Select the workspace you want Claude to help configure.
- Review the requested access and select Allow access.
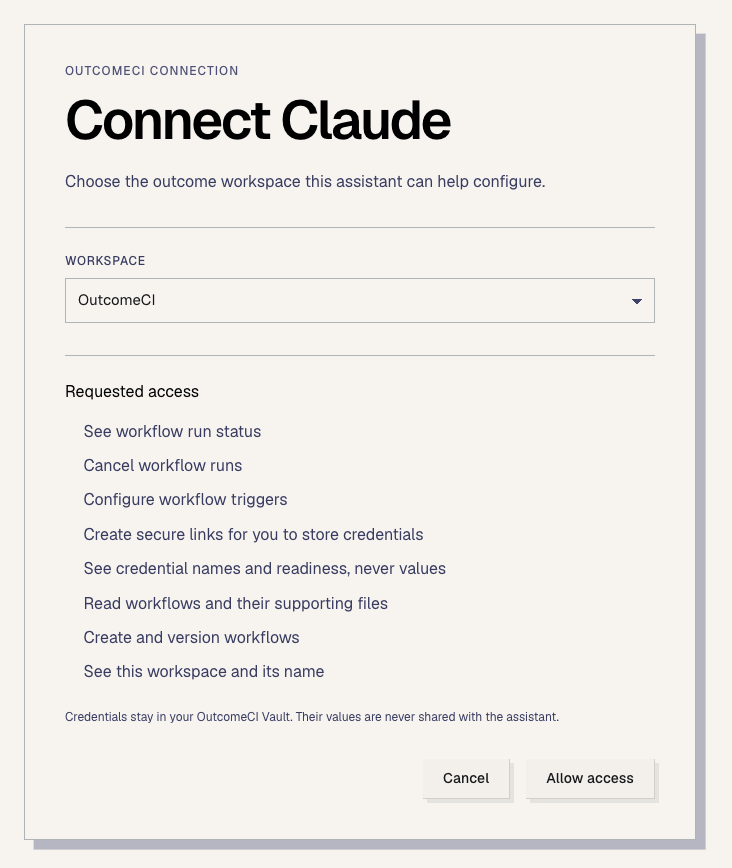
The access applies only to the workspace you choose. Credentials stay in your OutcomeCI Vault, and their values are never shared with Claude.
Choose what Claude may do
Back in Claude, the connector page now lists every tool the server provides, grouped by what it does. Each tool has three settings: allow it, ask you first, or block it. The menu beside a group sets every tool in it at once.
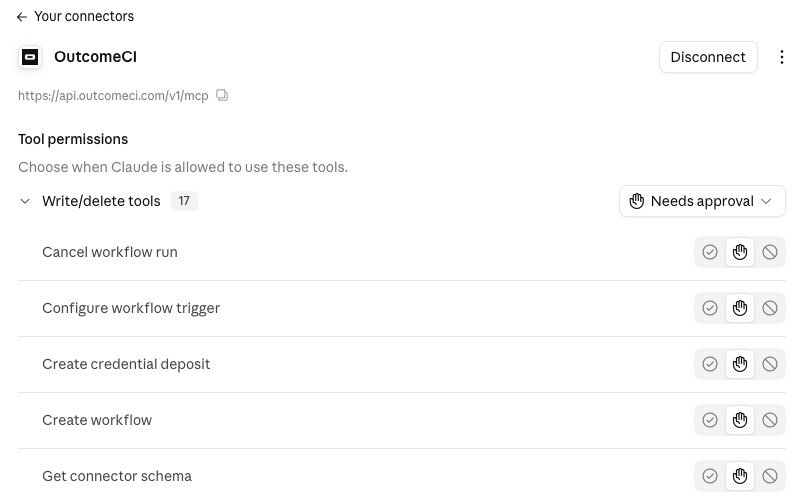
A sensible start is to let Claude read freely and ask before anything that creates or changes a workflow. Loosen it once you trust what it does.
Use it in a chat
Connectors are switched on per conversation. In a new chat, open the tools menu under the message box and turn on OutcomeCI. Then describe what you want:
Help me create an OutcomeCI workflow that takes a feature request from Slack, discusses a plan with the requester, waits for their approval, and opens a pull request in the agreed repository. Show me the workflow before publishing it.
When Claude reaches a tool set to ask first, it stops and shows you the call before it runs.
When a workflow needs a credential, OutcomeCI gives you a browser form for it, so the value goes into your Vault and never passes through the conversation.
On desktop and mobile
Connectors belong to your account, not to one app. Once added and connected on the web, the same connector is available in the Claude desktop and mobile apps. Turn it on in a chat the same way.
Troubleshooting
Adding the connector fails, or nothing is marked Detected. Claude could
not read the server's sign-in details. Check the URL is complete and uses
https. For OutcomeCI it ends in /v1/mcp.
The sign-in window closes without connecting. Choose Connect again on the connector's page.
You picked the wrong workspace. Choose Disconnect on the connector's page, then Connect again and choose the right one.
The connector is missing in a chat. It is off by default in each new conversation. Turn it on from the tools menu.
Claude never uses a tool. Check the tool is not blocked on the connector's page.
You cannot add custom connectors. Your plan may not include them, or, on Team and Enterprise, an owner manages connectors for the organization. Ask an owner to add it.
Next steps
- Connect your agent covers the OutcomeCI server for any MCP client.
- How to add an MCP server to ChatGPT does the same for OpenAI's ChatGPT.
- Set up a Slack app for OutcomeCI lets your workflows start from Slack messages.